Hi, I am Stan and this is my blog :)

How to Clean Sunroom Windows – Our Tips
With the addition of a sunroom, there is probably no better place in your home to relax and look out over the surrounding landscape. To appreciate the outdoor scenery all year round, you will need to keep your solarium windows away from mud, stains and clouds.
When is the best time to clean your sunroom windows? We recommend choosing an overcast day in early spring. Avoid sunny days, which can dry the glass too quickly and leave streaks.
Let’s cover the tools and procedures to bring clarity back to your cupboard windows, both inside and outside.
Gather your materials
The best way to clean windows in a tanning bed starts with the right tools: A soft, lint-free cloth, warm water, glass cleaner or gentle dishwasher, spray bottle, scraper (with a rubber blade about 10 inches long or longer).
Apply warm water and soap
To start washing solarium glasses, fill an empty spray bottle with a few glasses of water and a tablespoon or two soft soaps. Spray the mixture generously onto the inner windows. From the outside, you can use a hose to displace some material, but avoid setting up a jet or sink with electricity that could push water through the seals.
Scrub window
The heat of the sun can bake dirt and other stains on your vinyl frame. Use your rag to remove them and reapply soap and water as needed. Contact the company by clicking here.
Clean with Glass Cleaning Solution
You may need a glass cleaning agent if you have stains or marks that are difficult to remove and cannot be removed during cleaning. Before spraying, check and follow the instructions for using the product to see how to clean the glass in your sunbed as effectively as possible. You can let the solution work on the stains for a few minutes but rinse it thoroughly with water before it dries.
Scrubber to remove excess water
Use the scraper as a snowplough by pulling it horizontally from one side of the panel to the other. Work from top to bottom and overlap the scraper strokes about an inch, allowing excess water to flow down only from one end of the tool. We do it for top sunrooms in Myrtle Beach. Dry the scraper blade after each pass with a cloth and repeat this step until you reach the bottom.
Dry the windows
A squeeze action will push the water to the edges of the panel. Wipe vertically on the inside of the frame with a rag to collect any stains or droplets that may have lingering.
Open windows and doors
Increased airflow helps to reduce humidity and condensation, which limits the likelihood of strips forming as windows dry out. Stand back and admire your work!
Office space improvement techniques to increase productivity
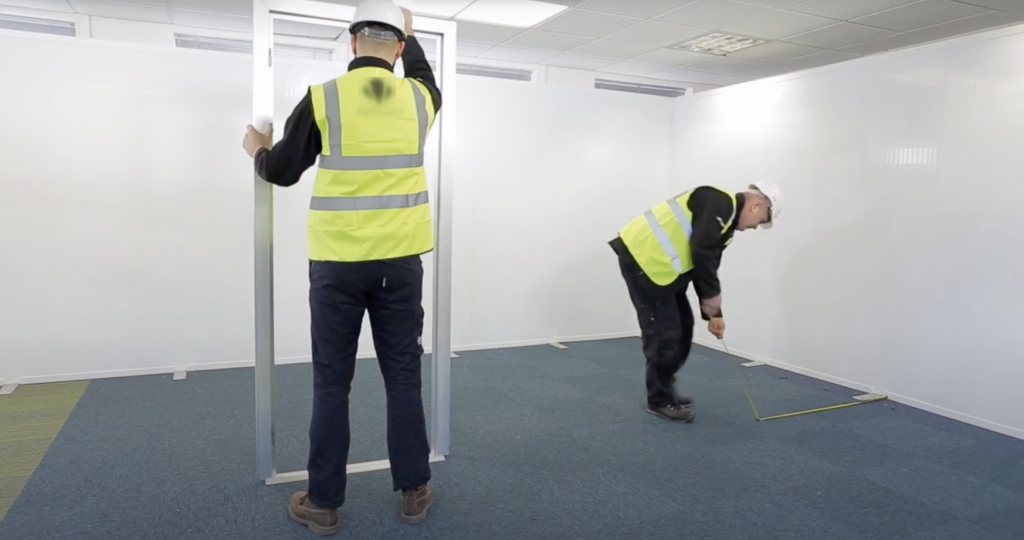
Every company manager craves to increase the productivity of their office staff and to keep it at its optimum. But most of them think outside the box while there is a simple trick in just improving the working space with minor adjustments. Some of the few adjustments include better lighting, use of modular office walls, and many more that we will discuss below.
- Conducive temperature
Extreme temperature variations, especially during hot afternoons, should be regulated using fans or controlled AC. During cold season heaters could be of great importance to boosting the working environment of employees. Assigning someone responsible for the same purpose will ensure everything is under control. Click here
- Introduce plants
The introduction of specifically live ornamental plants tends to bring in nature into office spaces, which are majorly closed. Sharing of spaces with living organisms, especially those that are beneficial (air purification), boost the psyche of staff.
- Eliminate gloom
Gloomy office spaces are a sure turnoff to many, incorporating proper lighting, which can be done by artificial lighting or, rather, the cheaper option of using modular walls goes a long way in solving the menace of dim spaces.
- Upgrade the furniture
Most office furniture happens to be very uncomfortable, this will range from very high desks to very low chairs that have been used for over a decade. This cumulatively affects the health of staff due to the strenuous working positions. Introducing modern therapeutic adjustable chairs and proper desks, among other furniture, will boost the working morale and increase productivity. https://krystalglasspartitions.com/custom-steel-glass-partitions/
- Create private areas
In most cases, people value privacy a lot, and due to this very reason creating private spaces just for the purpose of relaxing and holding an important conversation is very important. Employees need a time out of the spotlight just for the earlier mentioned reason and the fact that they spend much of their entire lifetime in offices.
- Clean up
Cleaning office spaces daily is not something to compromise on. Having dirty floors, litter all over and dusty desks, and other furniture is of negative impact on staff and even the clients that they serve. Despite this fact, most companies tend to compromise on this with the idea of saving on the cost of paying cleaners each month.
- Install modular office walls
Modular walls provide flexibility in handling various functions associated with running offices. They can accommodate the change in terms of the required office space with little hustle and at a lower cost when compared to drywalls.
- Offer work options
Always strive to offer various work options due to the diversity of people. Some prefer quiet working environments, while others do not mind the noise or interruptions. Others are okay, working on their feet and many other preferences.
- Introduce color
A simple as it sounds color by itself motivates or demoralizes people. For instance, color blue tends to be great for collaboration, while neutral colors tend to drain energy despite the fact that they taste full. more to Krystal glass
Glass Railing Systems
Are you seeking to enhance the design of your home or business space with glass railing? Then look no further. Crystalia Glass provides a wide range of base hardware choices: from long posts to heavy-duty base rails.
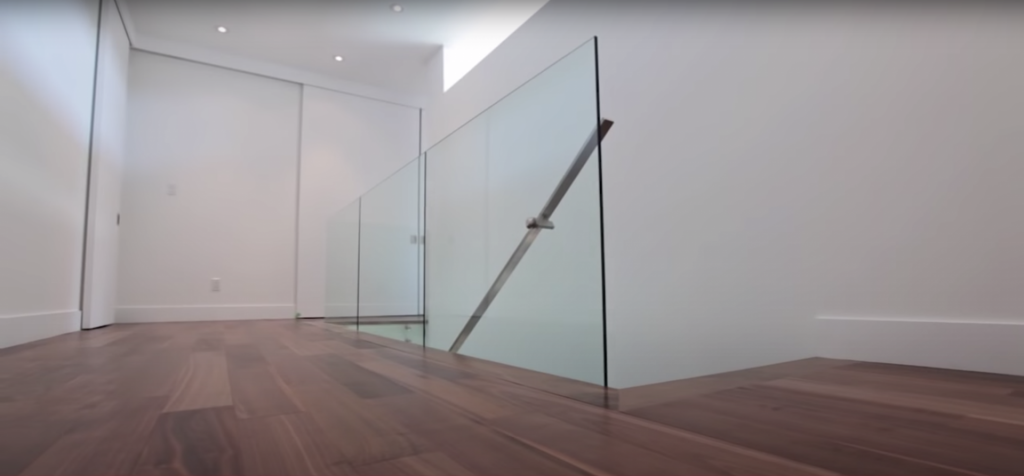
Glass railings give a touch of beauty to the interior of your premises: horizontally, glass railings do not divide the space into two, meaning the ceilings will appear a bit higher. The glass is as tough as any other substitute material and merges safety with intricate styles.
1. Glass stair rail.
Trendy and long-lasting glass stair rail systems for staircases of any design. Glass railing provides a present-time and rare appearance and combines in with every kind of interior design. Go url
Personalize your glass staircase yard or contact a specialist who will assist you select the choice that will best suit your home and business premises.
In present-day interior design styles, glass takes pride as holding in the position of the most flexible material that seems to be reasonable with numerous architectural designs. The choice to customize the staircase railing is most appealing to people who crave to give life to something native and outstanding. We provide a wide range of hardware of different coating from brushed stainless steel to personalized wood designs.
Our experts are there to reply to all your questions and avail of all the details about each of the four available glass railing structures. Go website now
2. Glass balustrade
Glass balustrade structures bring about a feeling of limitlessness and remove the visible bounds that reduce your space. Glass balustrades are secure and dependable and are not weighty and enormous. Nearly floating glass railings give a spacious and relaxed appearance to your premises courtesy of the lucidity of glass and the sheen of hardware.
Present-day architecture is way hard to image without a single glass entity. Glass renowned for its capability to merge in and supplement nearly any style. With glass balustrades, architects and designers are not bound by a single exact choice. The range of glass kinds, hardware sheens, and instilling flexibility gives enough opportunities for imagination. Change your home and business premises with our Glass balustrade systems. Our experts will guide you in selecting the best option for you.
3. Balcony Glass railing
Glass railing gives a trendy touch to any kind of building. The balcony lined in glass is a way of reviving the appearance of the building and add design to it. Glass railing for balconies is renowned for being lightweight, relatively easy to install, and being much time-efficient.
The wide range of the kinds of glass available allows the use of all your imagination in creating your dream balcony. Whether Tinted, patterned, or frosted, these are just a few alternatives from a large number of glass designs, of which all are worth consideration.
Depending on the general design of the building, our experts assist you in selecting the customized choice that appeals to your eyes and aesthetic sense. https://crystaliaglass.com/sliding-glass-door/
We pride ourselves in offering products that win the trust and reputation of our esteemed clients.
How to install a shower partition wall
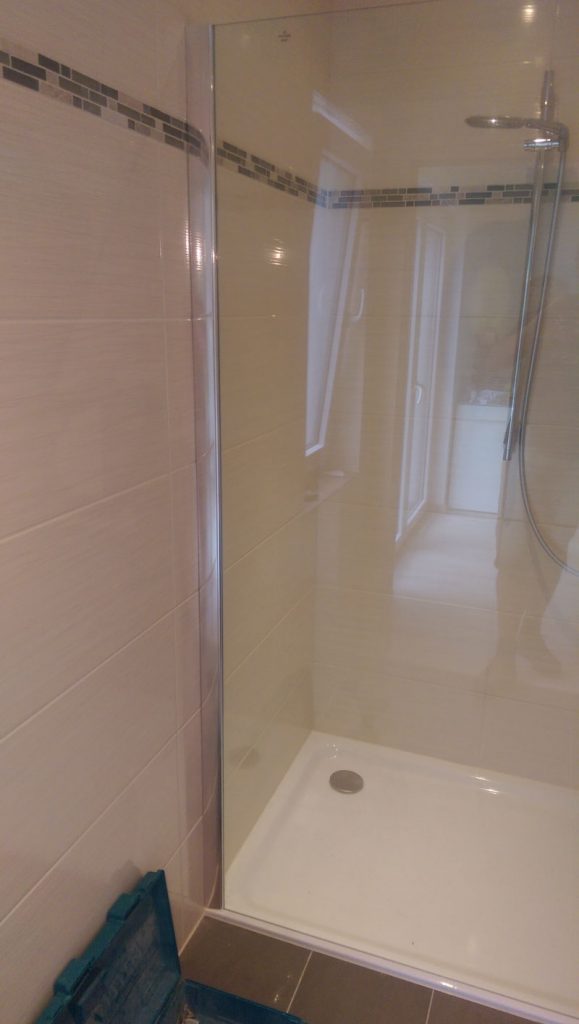
You are not sure whether you can install the shower wall on your own?
Here is the photographic proof: You don’t have to be an installer to install this shower wall!
In the bathroom or in the nearest room, prepare as much space as possible on the floor, on a double bed or similar for storing and unpacking the package.
If, in addition to installing shower enclosures, you need other services related to glass, you can contact the company.
Sort all small parts e.g. on a light towel next to the shower.
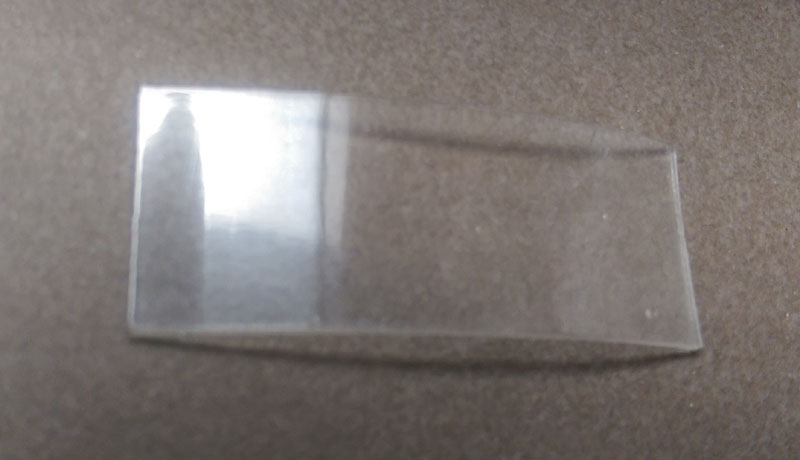
ATTENTION !
DO NOT dispose of this relatively inconspicuous because transparent piece of plastic! It is very important later!
You need for the assembly:
- a drilling machine with masonry drill for 6 mm and 8 mm holes
- a cordless screwdriver or a drill without impact
- a spirit level
- folding rule
- thin pencil
- screwdrivers
- pipe cutter or metal saw and metal file
- silicone (recommendation: in the colour of the shower tray, usually white)
- vacuum cleaner
- two strong people, you included! A third and fourth person may be necessary for transport to the bathroom.
Step 1
The 2 m long chrome-plated aluminium strip is first screwed to the wall. Screws and dowels are included in the package.
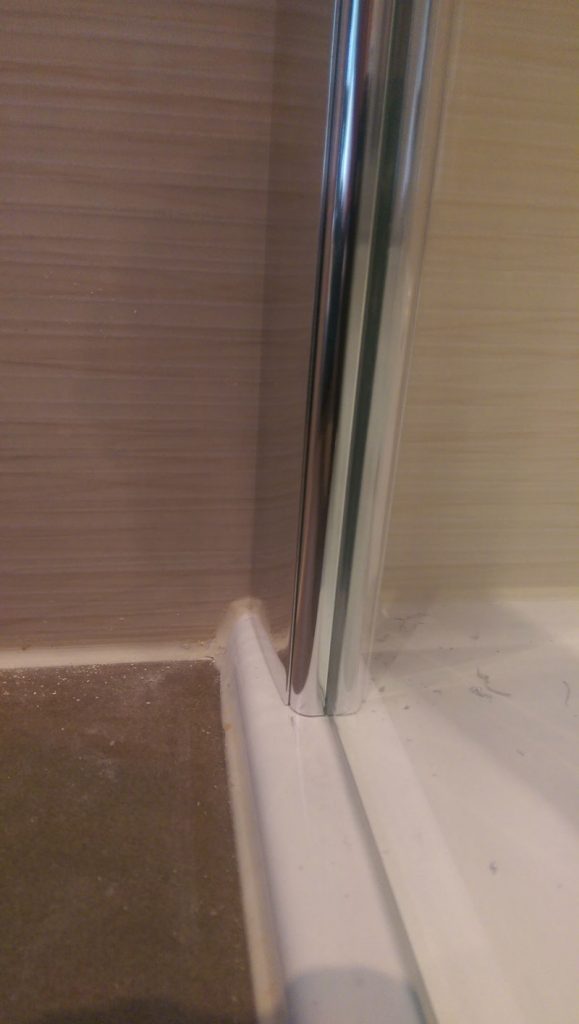
When positioning the aluminium strip, make sure that it is 5 to 10 mm from the edge of the shower tray.
When aligned and firmly screwed on, the shower wall is placed in front of the aluminium strip on the shower tray and then carefully pushed into the aluminium strip without scratching the shower tray.
The shower wall is already standing and can now be aligned parallel to the edge of the shower tray – either by eye or measured with a folding rule or other aids.
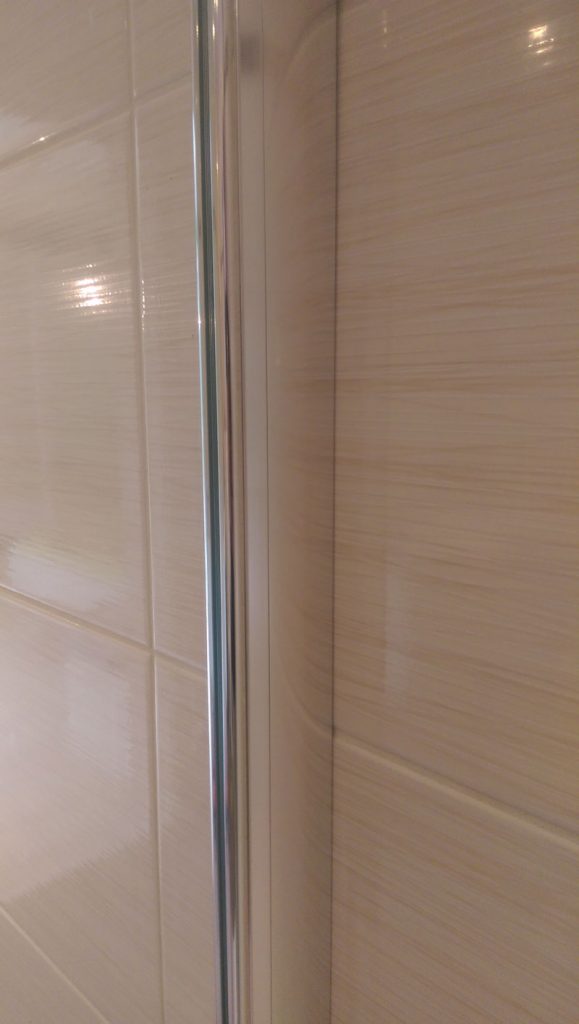
If the tiler has not worked perfectly:
Any unevenness in the wall or in the wall tiles is compensated by the aluminium strip, the pane stands straight at the end in the strip.
Visible gaps because of the unevenness in the wall tiles can be covered by a silicone seam.
On the photo here on the left everything is very good, here one could do without the silicone seam.
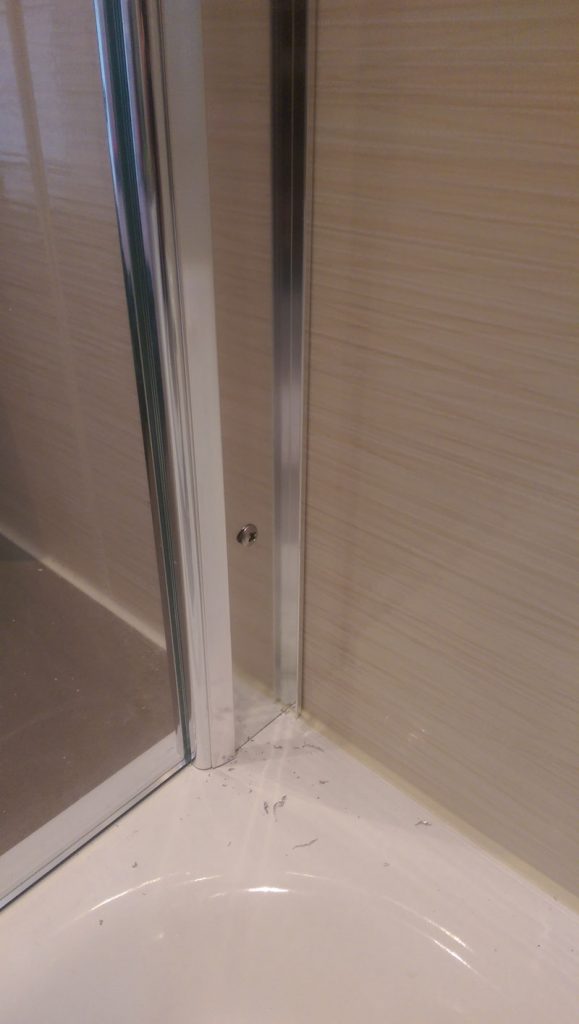
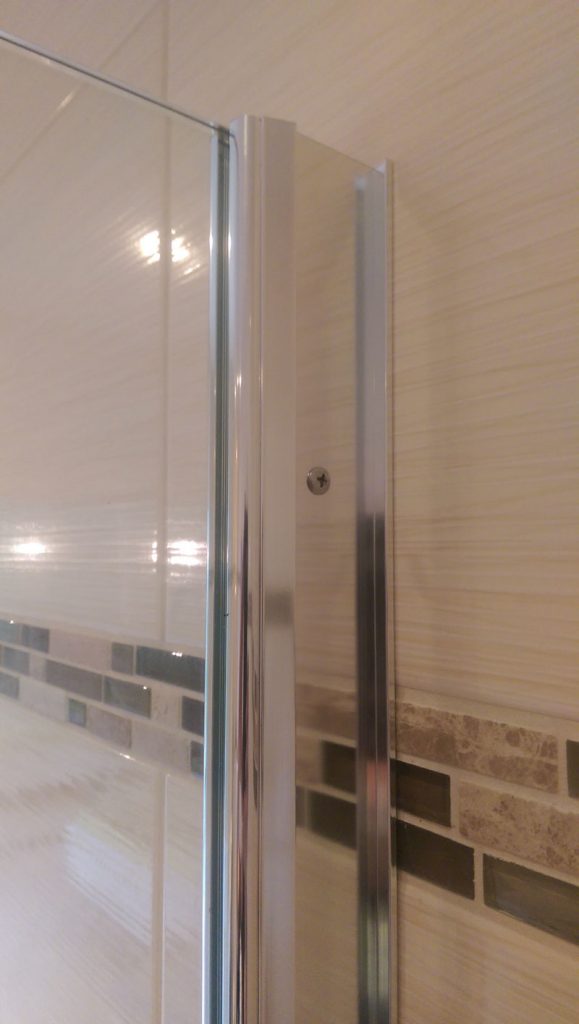
Inside, the aluminium strip screwed to the wall is pre-drilled twice:
With the metal drill included in the package and your cordless screwdriver, drill through the two pilot holes in the aluminium profile of the glass pane, then screw in the two short screws included.
This fixes the glass pane in the aluminium strip.
Please do not sweep away the aluminium chips produced during drilling, but carefully vacuum them off to avoid scratches in the shower tray.
At the end of step 1, press the chrome-plated aluminium rail inside into the aluminium strip.
Tip: Place the aluminium rail in position and start approximately in the middle, but please do not use a rubber hammer or other striking tools, but only your hands or fingers.
When it clicks into place, push the rail downwards until the lowest part clicks into place with a clear sound. Then do the same from the middle upwards.
2nd step
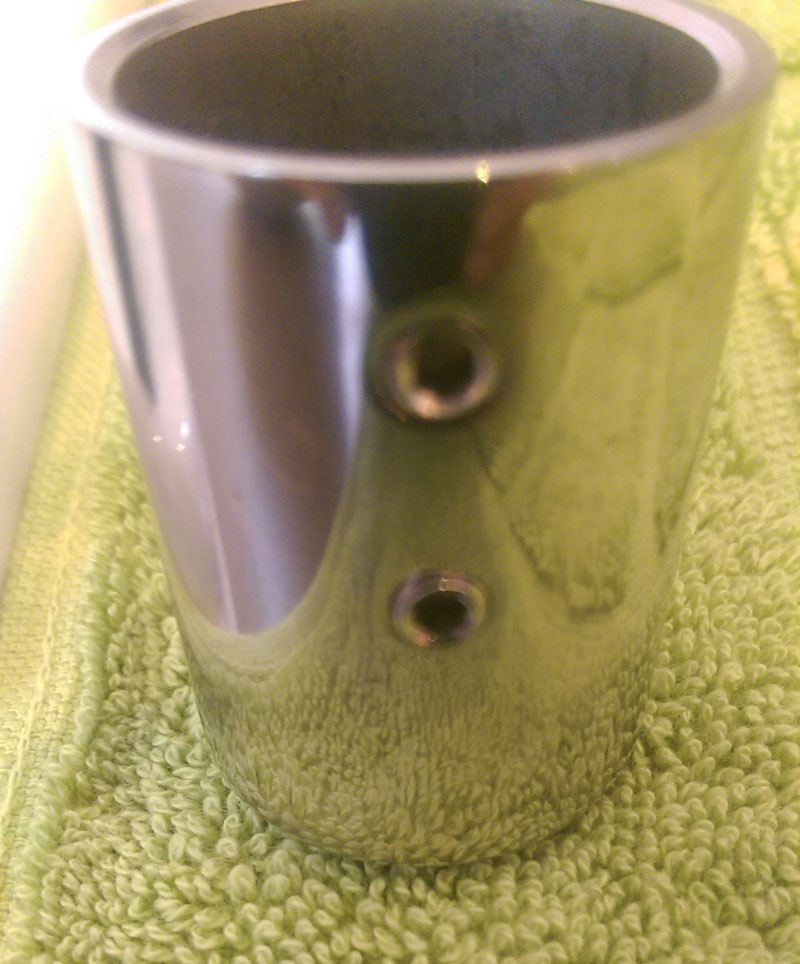
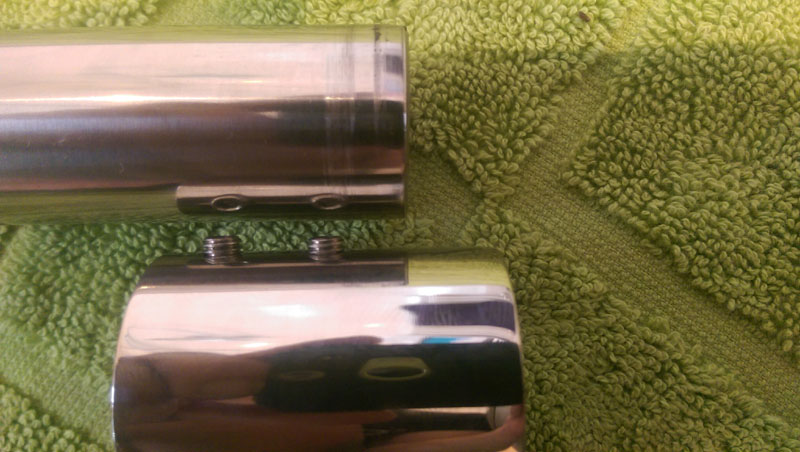
Unscrew the Allen screws in the head piece and wall piece using the Allen wrench provided until the pipe piece can be inserted loosely.
Insert the tube into both end pieces of the cross bar and tighten the two Allen screws so loosely that the tube cannot slip out.
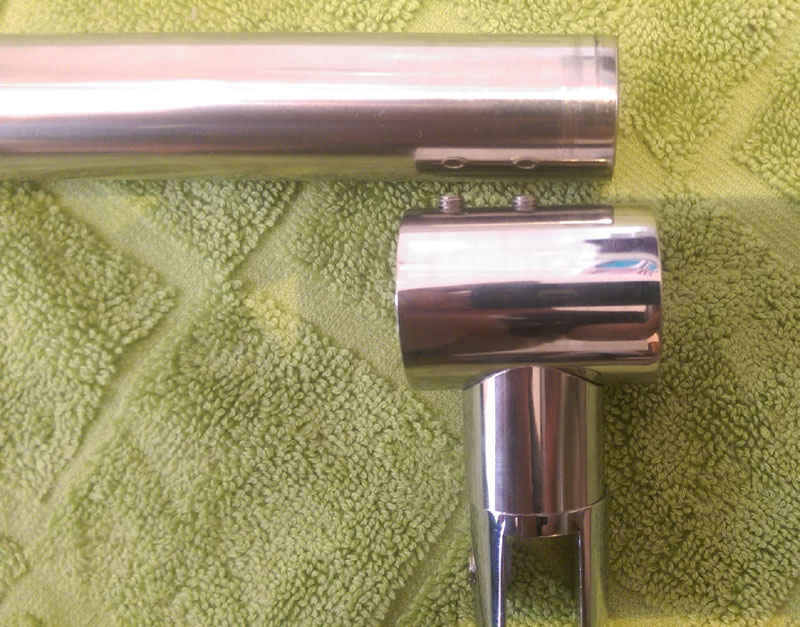
Tip: if the wall to which the traverse has to be screwed is not parallel to the shower wall, you can loosen this Phillips screw and align the traverse accordingly!
This is a decisive advantage of this shower wall compared to many other competitor products!
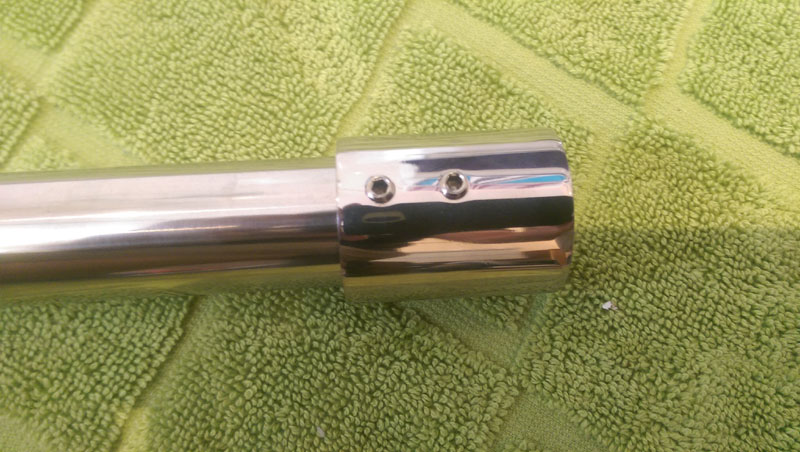
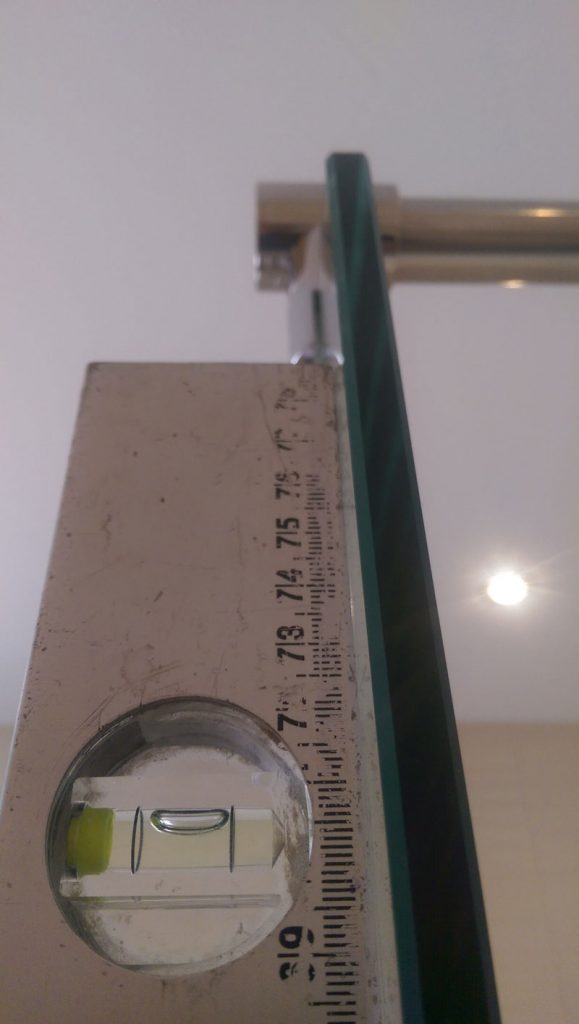
Now measure the necessary length of the traverse from the middle of the glass to the wall.
If necessary, align the shower wall with the spirit level at the upper corner.
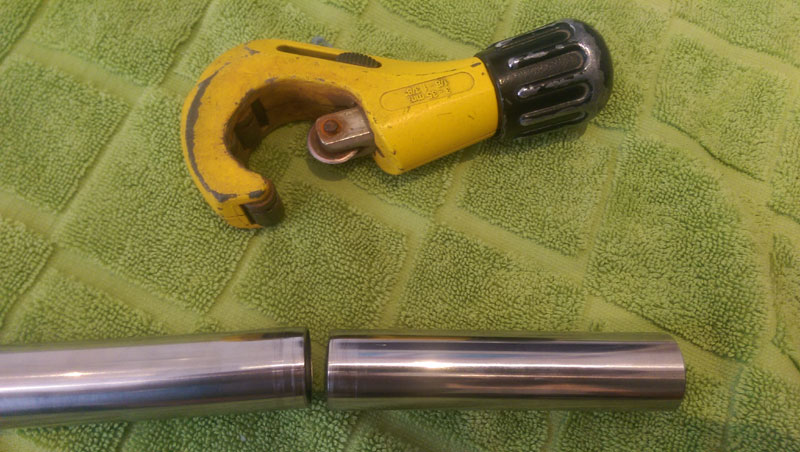
If the traverse is too long, please shorten it to the required length, e.g. with a pipe cutter or a metal saw. If necessary, deburr the edge with a metal file.
Step 3
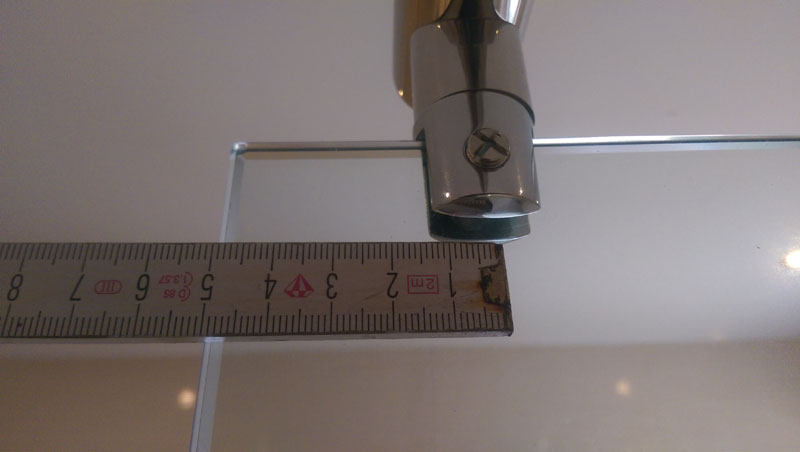
The head piece of the traverse is positioned approx. 5 cm away from the shower corner.
ATTENTION: Do not screw it on yet, just put it loosely onto the glass!
Now align the traverse with spirit level and folding rule and mark the position of the wall piece on the wall tile with two pencil strokes.
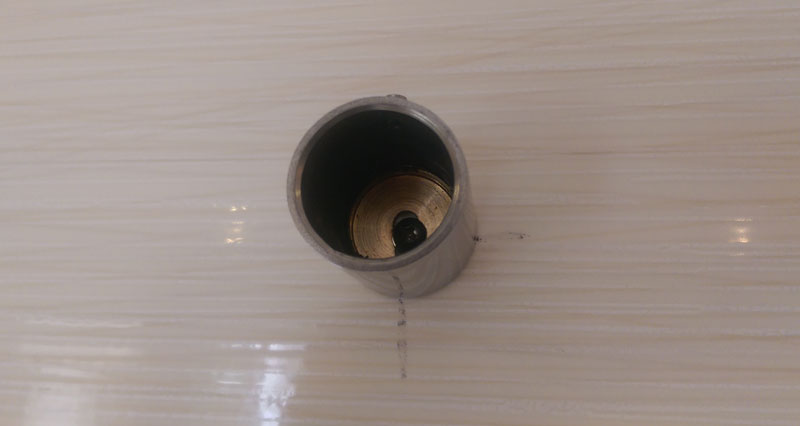
Remove the wall piece from the pipe, mark the drill hole and drill, finally screw on the wall piece.
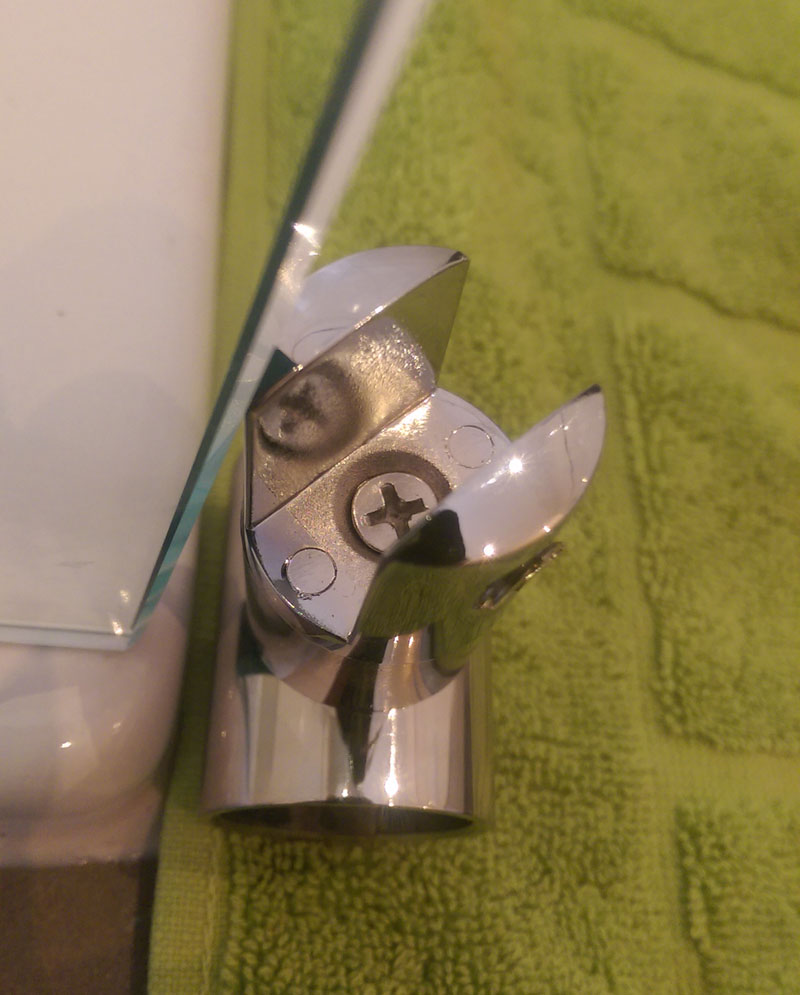
And now comes this inconspicuous plastic part!
Insert it into the U-shaped head piece so that it completely decouples the metal head piece from the glass when the head piece is attached to the glass pane. (And should it get lost, take an empty shampoo bottle and cut out a suitable piece of plastic with a cutter knife. It is important that the material is flexible and not too thick, because it must fit between the headpiece and the glass pane.)
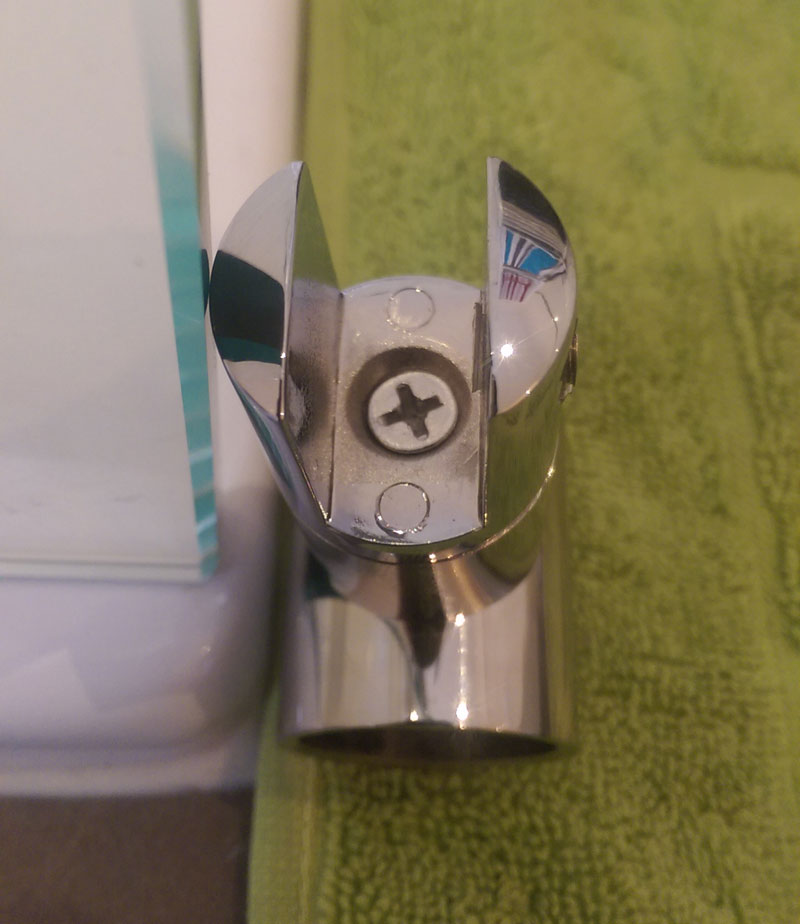
Now you can fix the Phillips screw on the head piece by hand.
Now you can hand-tighten the Phillips screw on the head piece, the screw will no longer damage the glass.
Finally, hand-tighten the two Allen screws in the head piece and the wall piece.
Step 4
Seal the glass wall at the bottom of both (!) sides with silicone. In this case, the silicone not only seals the shower wall, but also fixes it at the bottom to prevent it from slipping!
Ready !
At the end probably a few parts remain.
But don’t worry about it, you haven’t done anything wrong! The accessory bags are arranged for different shower wall sizes, and depending upon shower wall then this or that part remains at the end. Please simply dispose of them in a waste bin or a yellow sack.